
Pattern designed by VioletAndOberon
Introduction
I have always been somewhat of a space nerd. For my 10th Christmas, I was gifted a telescope and an astronomy book. Lookin up has remained one of my favourite hobbies ever since. I usually never miss any Nuit des étoiles. In summer, I put on a big cardigan and bring my telescope on the terrace in the middle of the night to look at the Perseids meteor showers. In winter, I love listening to Star Talks, Neil de Grasse Tyson and Chuck Nice have such a fun way to share knowledge about the universe.
As I am getting more into creating crochet wearable, I thought I should make a cardigan that shows my passion for space.
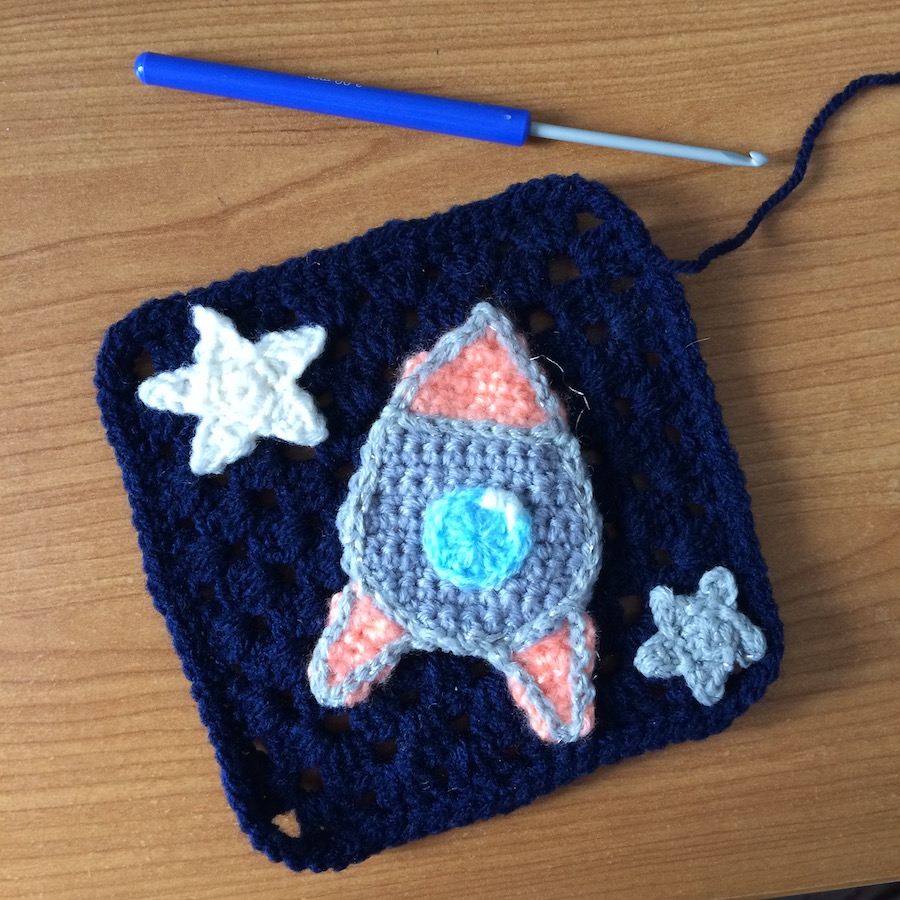
For the first blog article about this project, I have decided to share the pattern of the rocket spaceship appliqué that I have just designed.
Copyright information, the boring stuff
This pattern or any portion thereof may not be reproduced in any manner whatsoever without the express written permission of VioletAndOberon.
This pattern is available free of charge, not only because it is pretty straightforward but also because a considerable number of my followers comes from low-income countries. Be nice and provide attribution.
Pattern information
Material
-
3 mm hook
-
Yarn needle
-
Scrap yarn in the color of your choice. I used salvaged yarn made for 2 mm needles in blue, grey, glitter grey, orange, and white.
Necessary skills
-
Working in rows and in the round
-
Single crochet
-
Double crochet
-
Slip stitch surface crochet
-
Increasing and decreasing
Propulsion system and nose cone of the rocket
Start with grey yarn. Ch7.
R1 Turn. SC6. (6)
R2 Ch1. Turn. SC6. (6)
R3 Ch1. Turn. SC-inc, SC4, SC-inc. (8)
R4 Ch1. Turn. SC-inc, SC6, SC-inc. (10)
R5 Ch1. Turn. SC-inc, SC8, SC-inc. (12)
R6-8 Ch1. Turn. SC12. (12)
R9 Ch1. Turn. SC-dec, SC8, SC-dec.(10)
R10-12 Ch1. Turn SC10. (10)
R13 Ch1. Turn. SC-dec, SC6, SC-dec (8)
Switch to orange yarn. You may wish to start with a standing single crochet for you color change to be easier and more secure.
R14-15 Ch1. Turn. SC8. (8)
R16 Ch1. Turn. SC-dec, SC4, SC-dec (6)
R17 Ch1. Turn. SC-dec, SC2, SC-dec (4)
R18 Ch1. Turn. SC-dec, SC-dec (2)
R19 Ch1. Turn. SC-dec (1)
R20 Ch1. Cut, weave in the tail in the stitches on the wrong side towards the center, not along the edges.
Fins of the rocket
Make 2.
With orange yarn.
Ch4.
R1 SC3 (3)
R2 Ch1. Turn. SC3. (3)
R3 Ch1. Turn. SC2. Do not work the last stitch. (2)
R4 Ch1. Turn. SC2. (2)
R5 Ch1. Turn. SC1. (1)
R6 Ch1. Do not cut the yarn.
SS along the crenelated edge.
Keep a tail long enough to sew it to the sides at the bottom of the propulsion part of the rocket. Sew along the wrong side of the rocket.
Window of the rocket
With blue yarn.
Ch3.
R1 DC 11 into first ch.
You may prefer doing DC12 into MR instead.
Use white yarn to stitch a some arcs of light reflection into the window.
Make it look extra awesome
With grey glitter yarn. Fun fact, the yarn I used was from a store-bought child sweater that I frogged.
Start at the bottom centre of the rocket. Surface crochet on the right side of the work with slip stitches all along the edges and between color changes.
Bonus
How to crochet a small star appliqué
Ch2.
R1 SC5 into first ch. SS into first SC.
R2 repeat 5 times: Ch3, SS into 2nd ch, SC into 1st ch. SS into next SC.
Keep enough tail to sew it onto your favorite granny square or other crochet item.
That’s it!
You are now the proud maker of a really fun and sweet rocket crochet appliqué. Give yourself a tap on the back. If you crochet at the same speed as me, it probably took you an hour. Remember to stretch your hands, they have worked really hard.
Support a creator
I hope you enjoyed making this appliqué. I will be sharing more about this project very soon.